I've installed Grist - now what?
Grist lives inside your Shopify admin. Go to Apps → Grist (in the left sidebar of your admin) to open it any time.
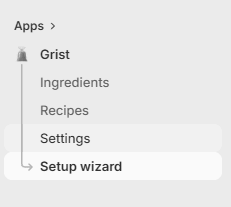
Grist setup wizard, welcome
The first time you open Grist it launches a short setup wizard that walks you through turning your existing Shopify products into brewing ingredients. It has four steps:
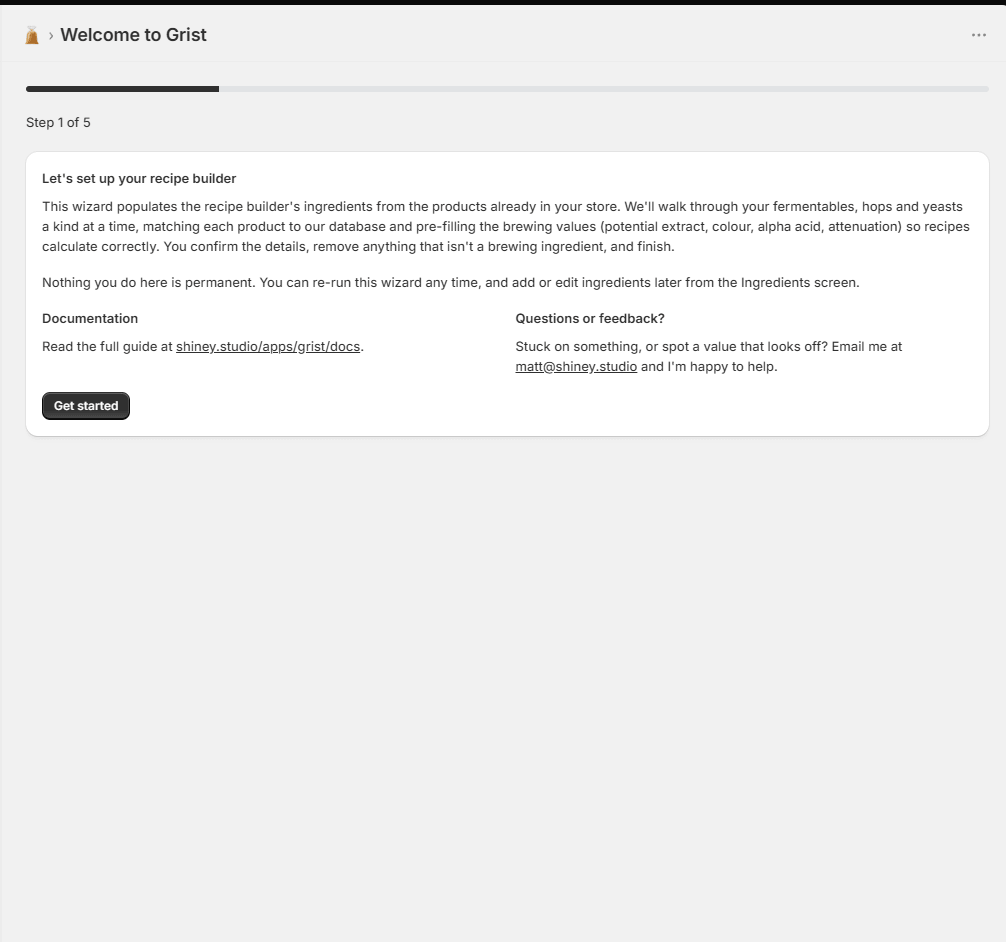
Grist setup wizard, welcome
- Fermentables & sugars - base and specialty malts, plus sugars and adjuncts (lactose, dextrose, flaked oats). Where we recognise a product we pre-fill its PPG (potential extract) and °L (colour) - just check the values and add the maltster.
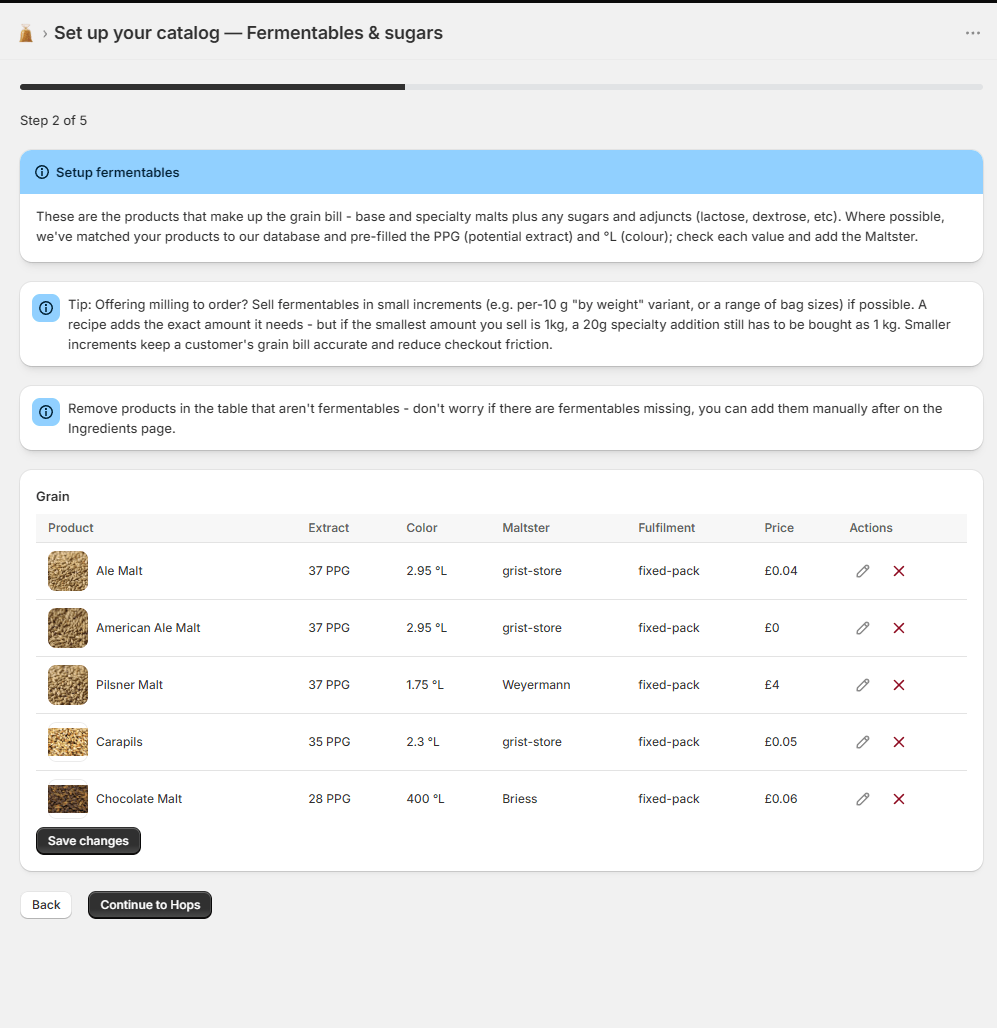
Grist setup wizard, fermentables & sugars screen
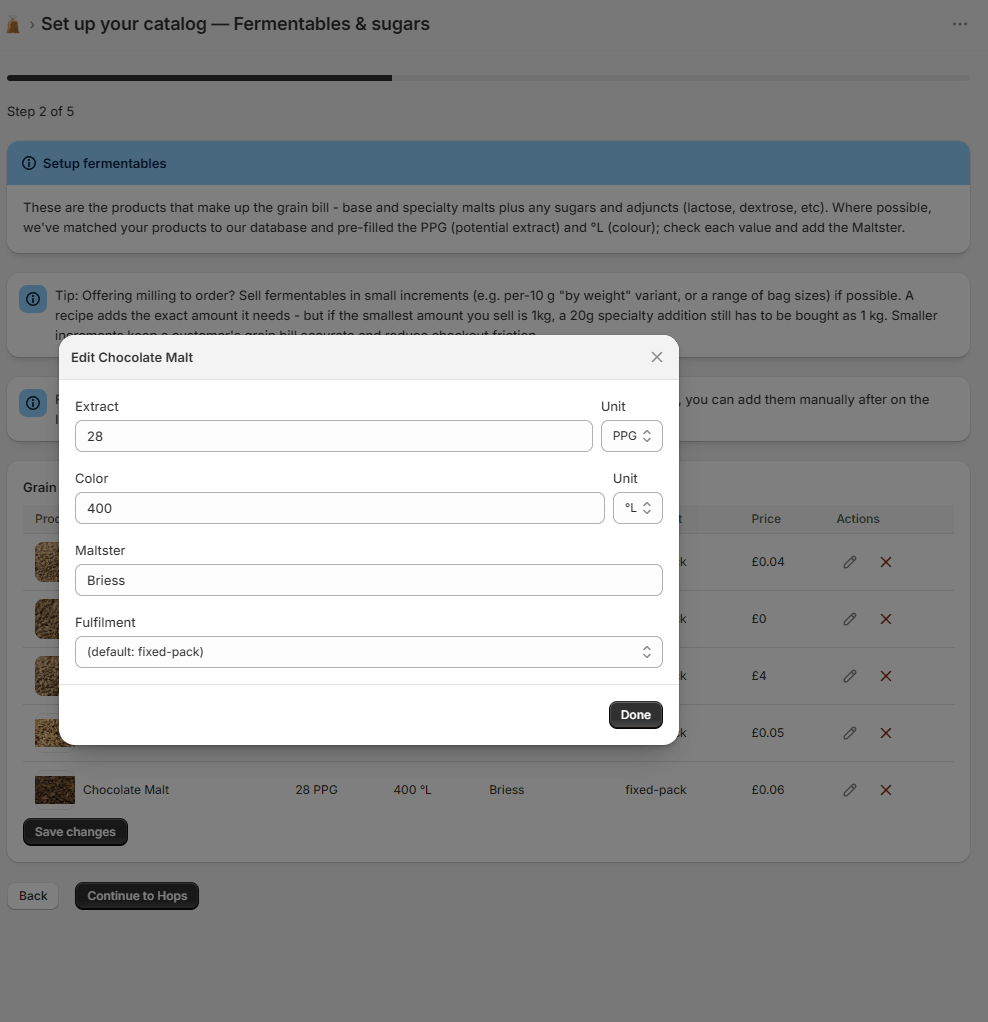
Grist setup wizard, fermentables & sugars - editing
- Hops - we pre-fill alpha acid % from our database; you'll usually want to fine-tune it and add origin and crop year.
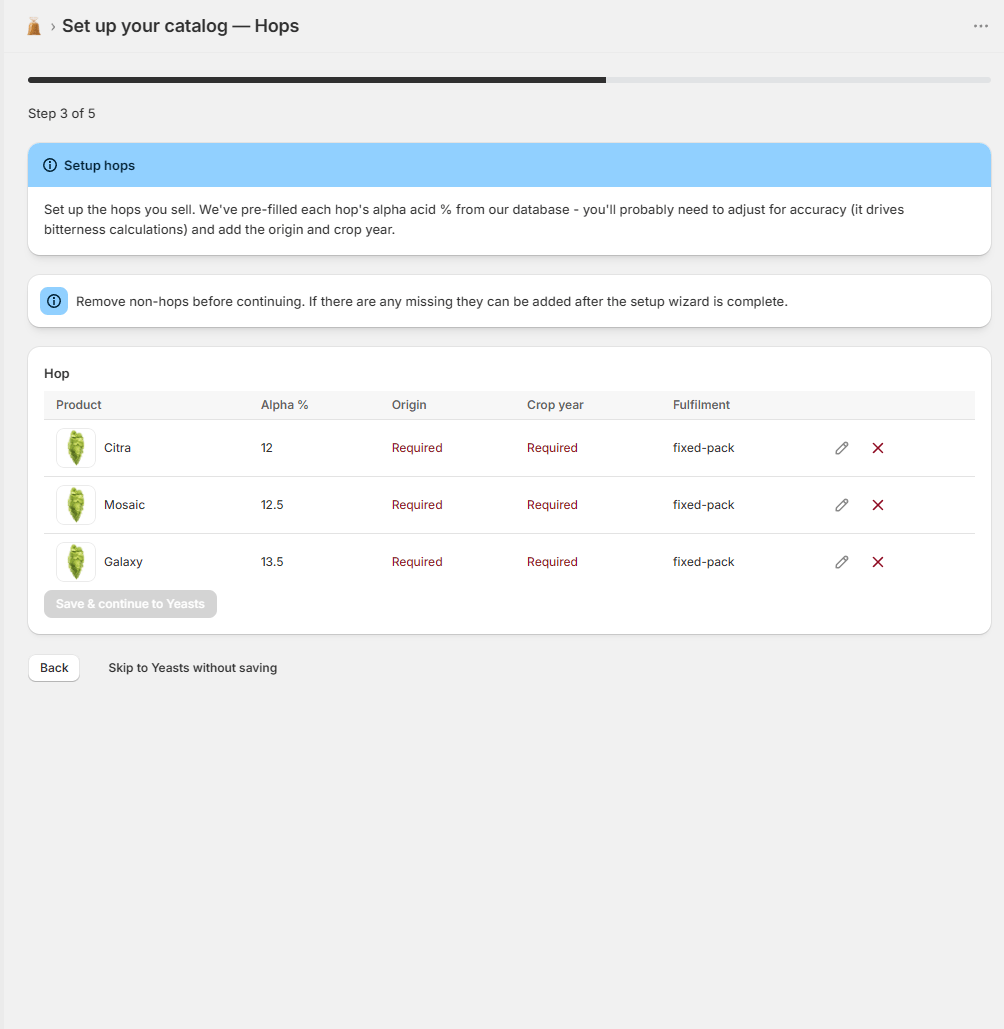
Grist setup wizard, hops screen
- Yeasts - confirm each strain's attenuation % and pick its pack format.
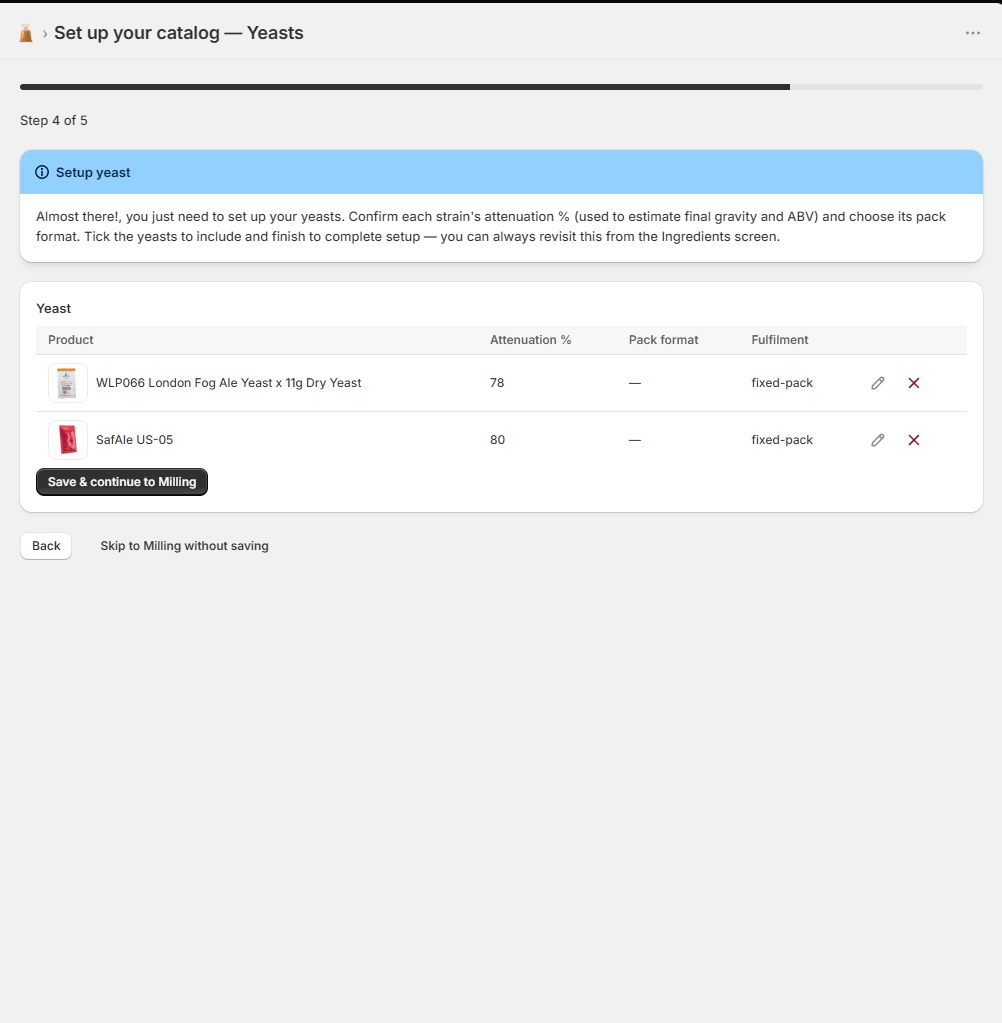
Grist setup wizard, yeast screen
- Milling (optional) - choose whether to offer milling on the builder, and whether it's free or paid.
You don't have to get everything perfect here - you can remove anything that isn't really an ingredient, and add missing ingredients later from the Ingredients page. When you finish, Grist takes you to its home dashboard.
Need to run it again? The wizard is re-runnable at any time - open Grist's home page and click Re-run setup.
How do I create my own recipes?
Recipes are managed inside the app under Recipes.
- In Grist, open Recipes and click New recipe.
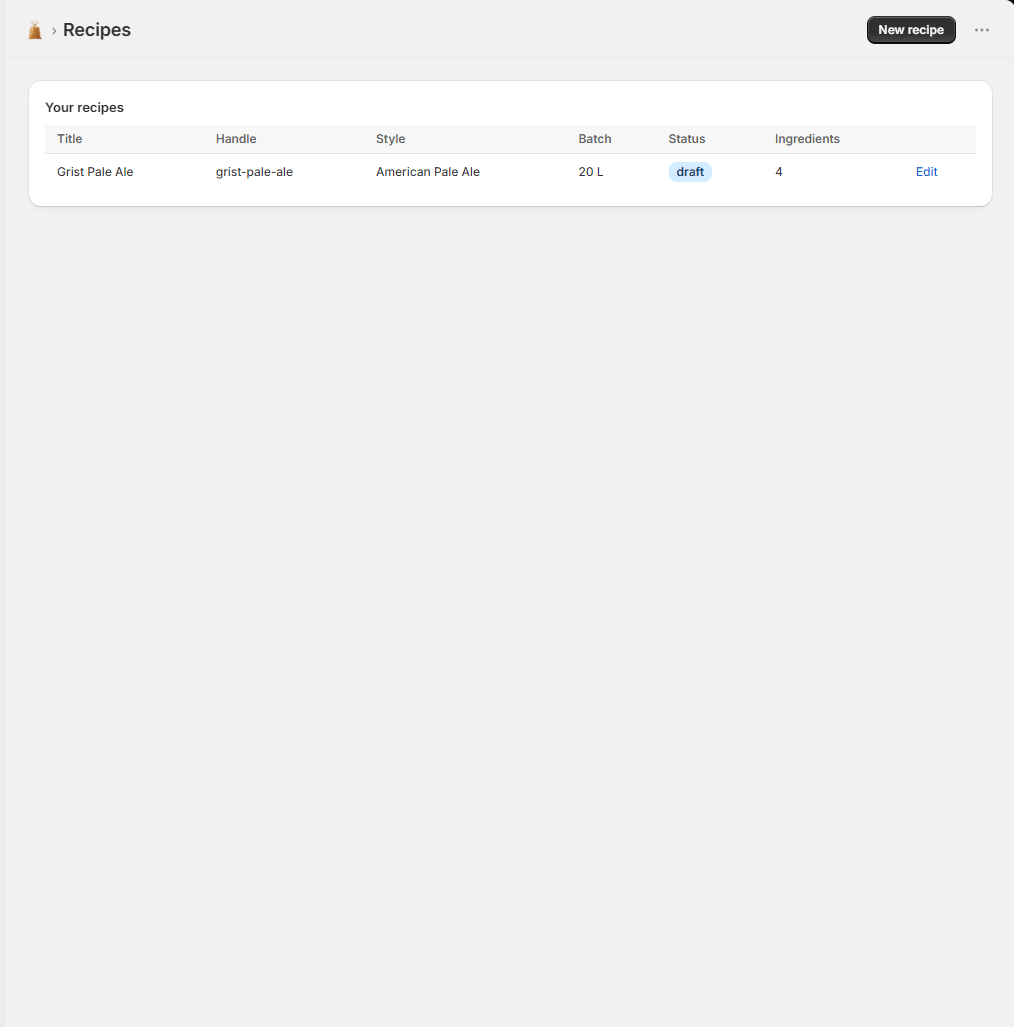
Recipes screen
- Fill in the details - title, target style, batch size, efficiency, and notes.
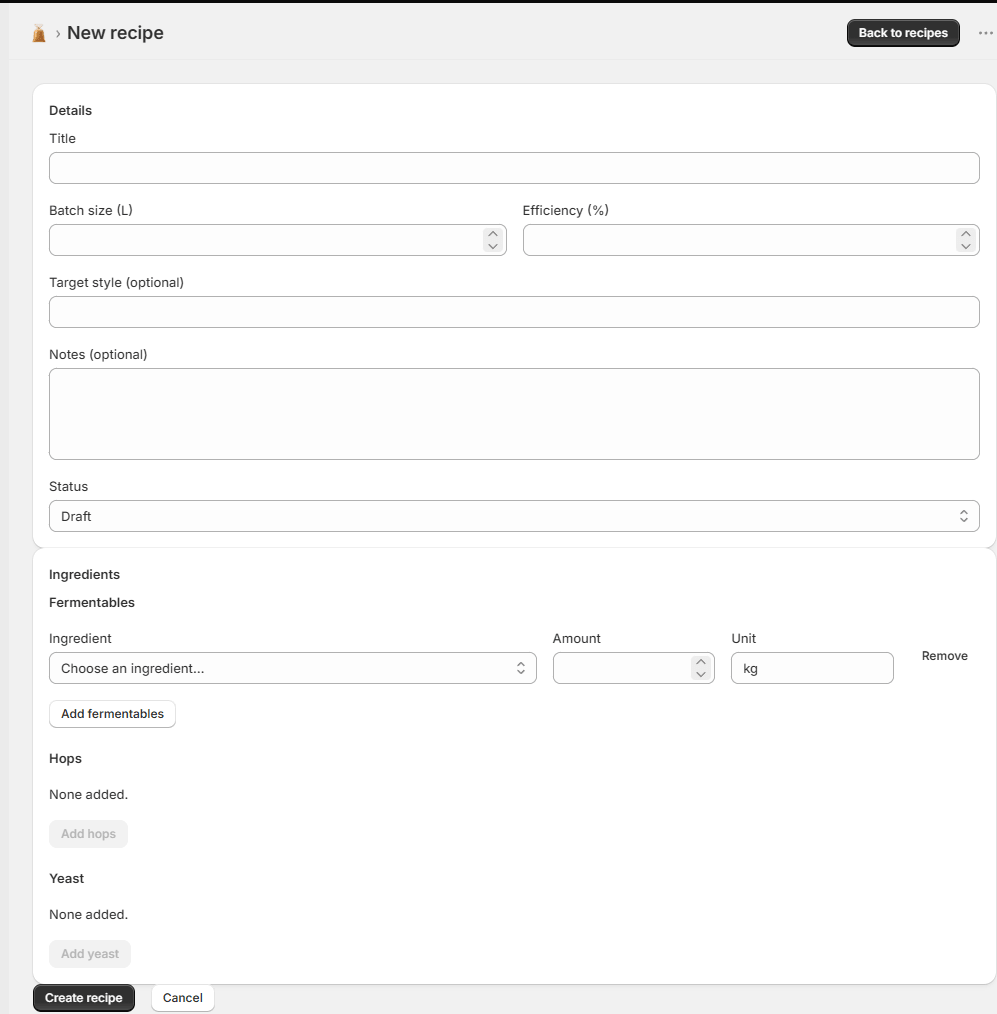
Add new recipe page
- Add ingredient lines by choosing from the ingredients you set up during onboarding (fermentables, hops with timing/use, yeast).
- Save. New recipes start as a draft; set the status to Published when you want them to appear on your storefront. When you're ready to embed the recipe, copy the handle from the recipes table.
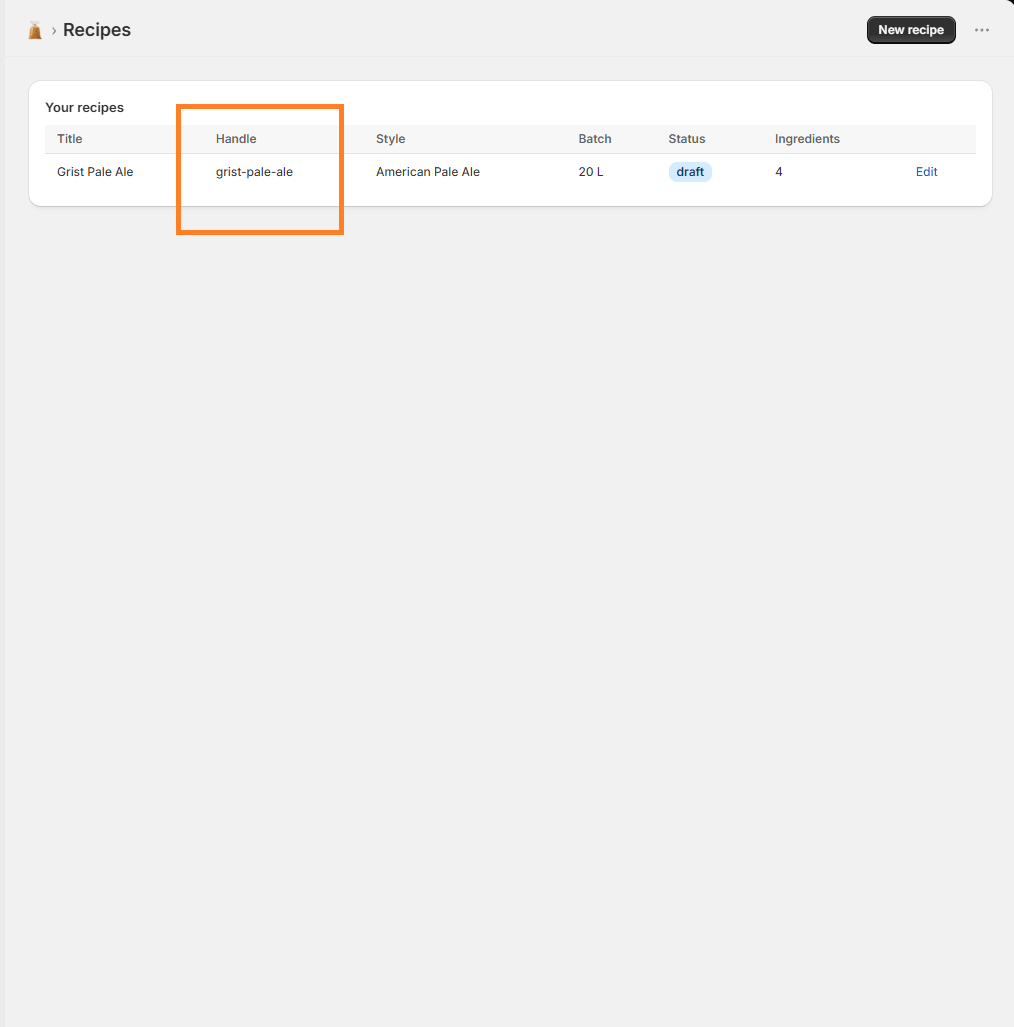
Recipe handle - required to embed the recipe on your page
Your recipes are listed on the Recipes page with their style, batch size, publish status, and ingredient count, and you can edit any of them from there.
How do I add a recipe to a page?
Grist ships a "Grist Recipe" block for your storefront. Adding this block to apage will make the recipe builder display, however you need to to tell it which recipe to show.
Now's a good time to create a template for your recipes if you haven't got one already, this will cut down on a lot of repetitive work (Shopify's guide to templates)
- In the theme editor, add the Grist Recipe block to your template.
- Next, open the page (or blog article) you want the recipe on.
- In the page editor, find the "Grist recipe" metafield and pick your recipe from the dropdown.
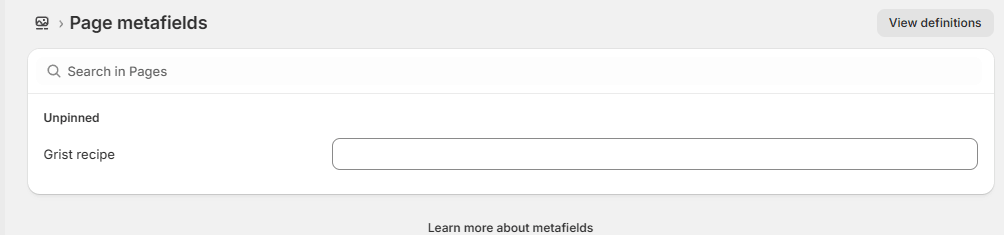
Edit theme
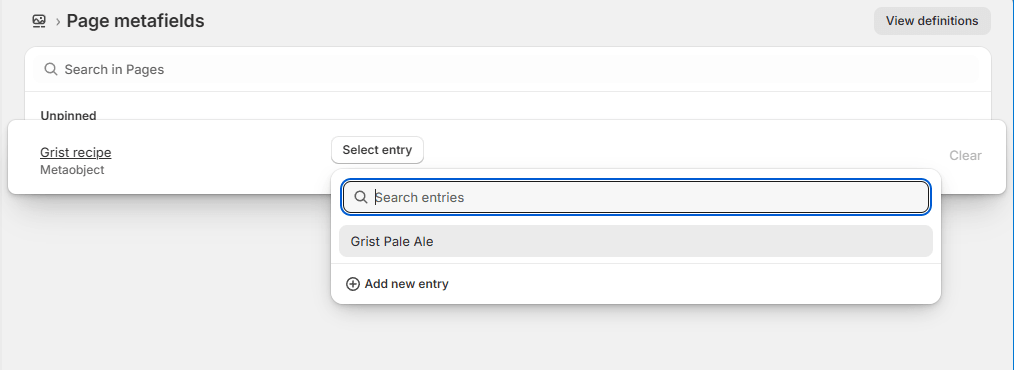
Select your recipe
The override way - typed handle
You can also set a recipes handle directly on the Grist recipe blocks' settings. This is useful for a once off, but the above approach will save you time. If you set the handle in here, it will override the metafield if that's also set.
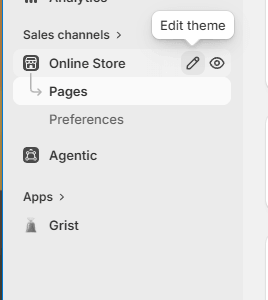
Edit theme
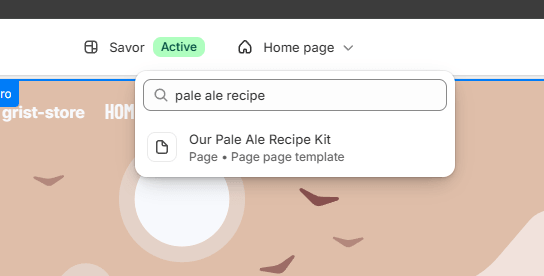
Locate your recipe page
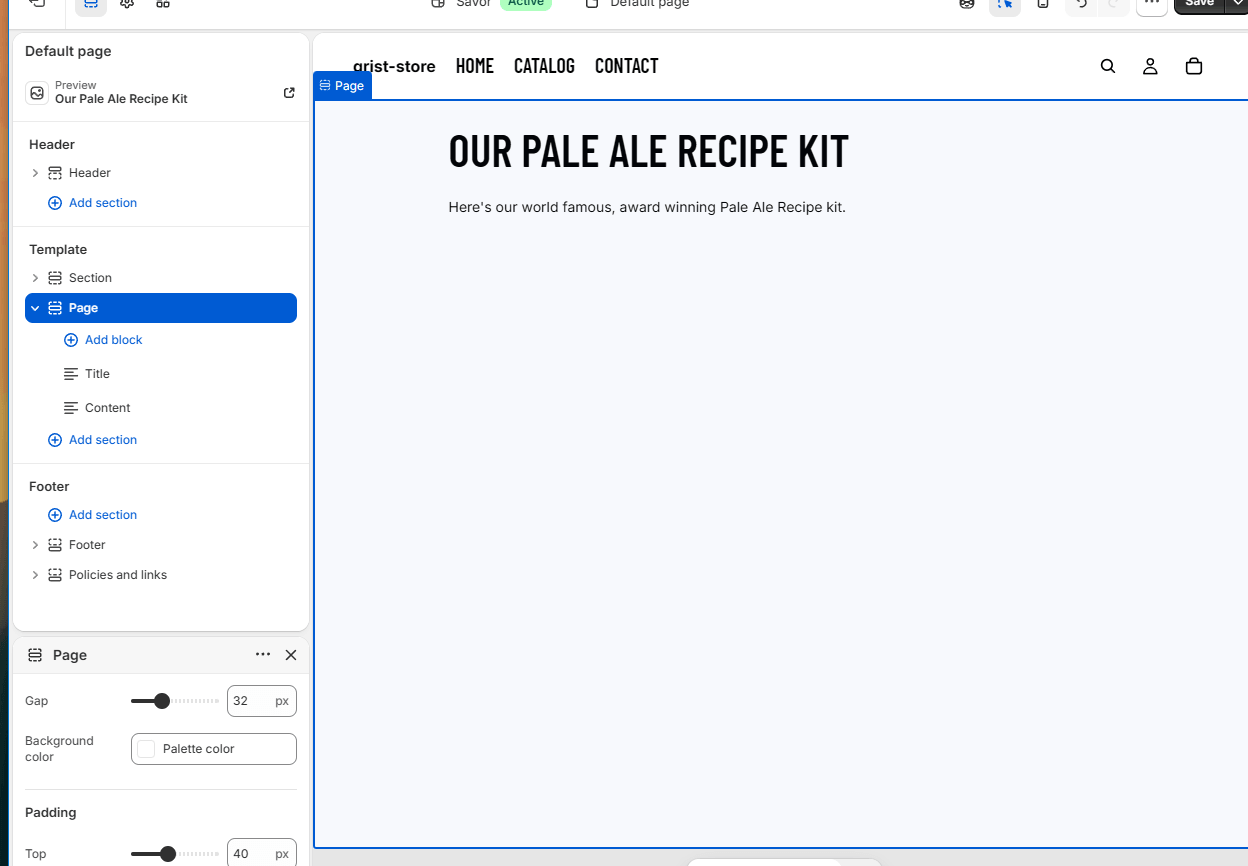
Navigate to the location you want to embed the builder and click 'Add block'
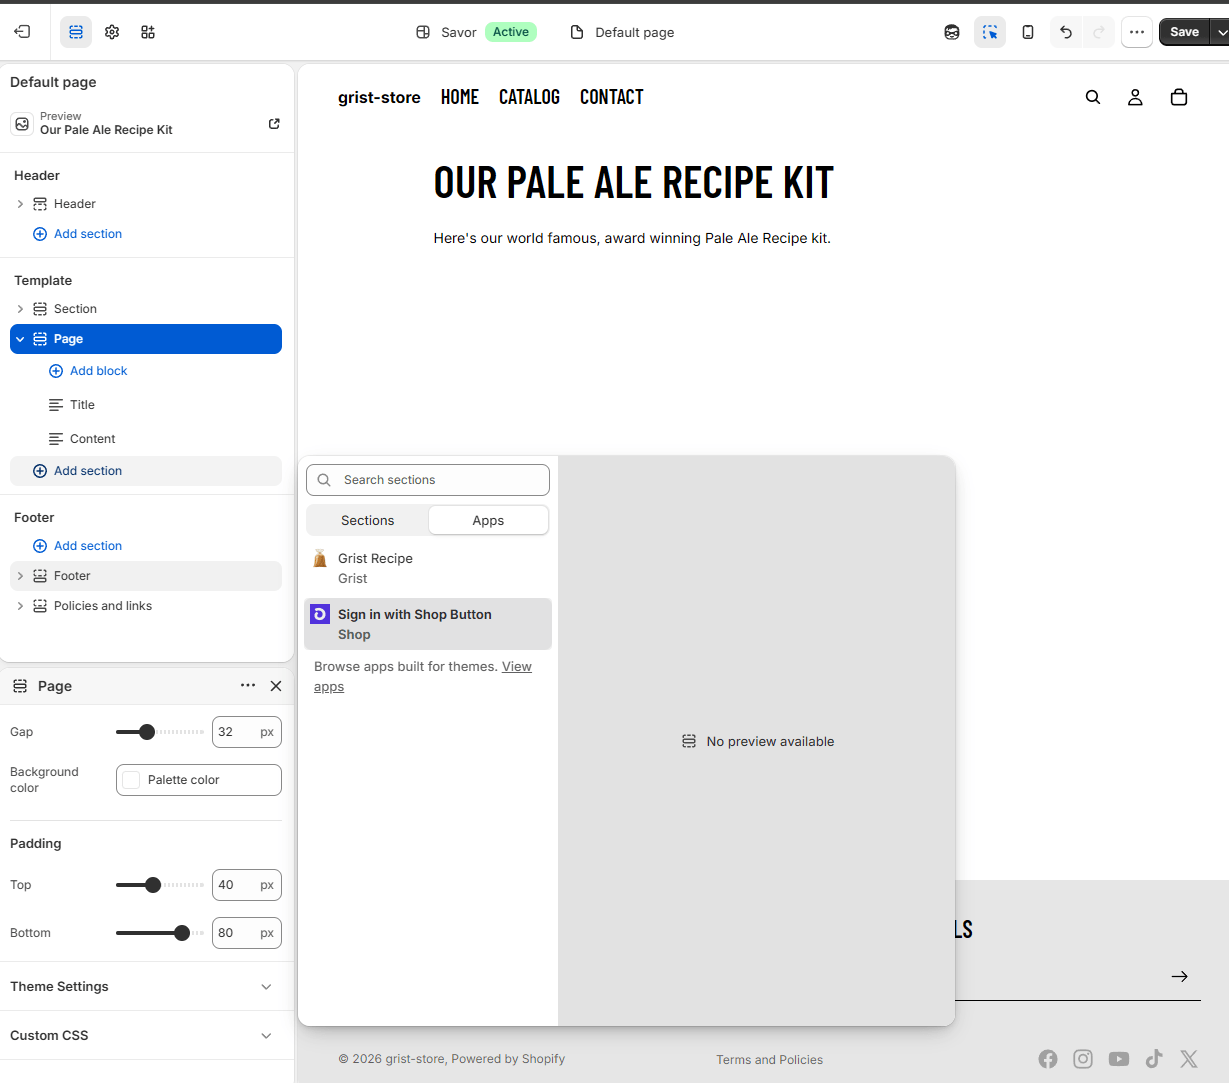
Locate the Grist Recipe block in the apps tab
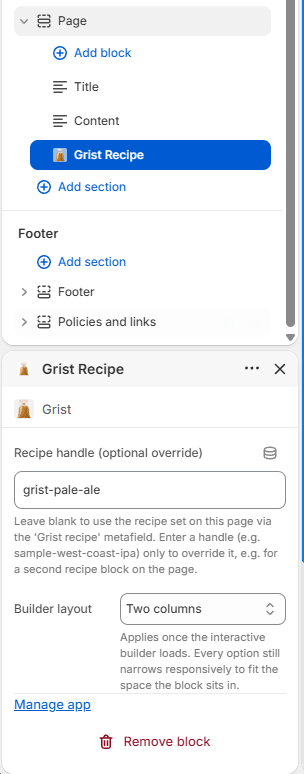
Add the recipe handle, optionally override the builder layout.
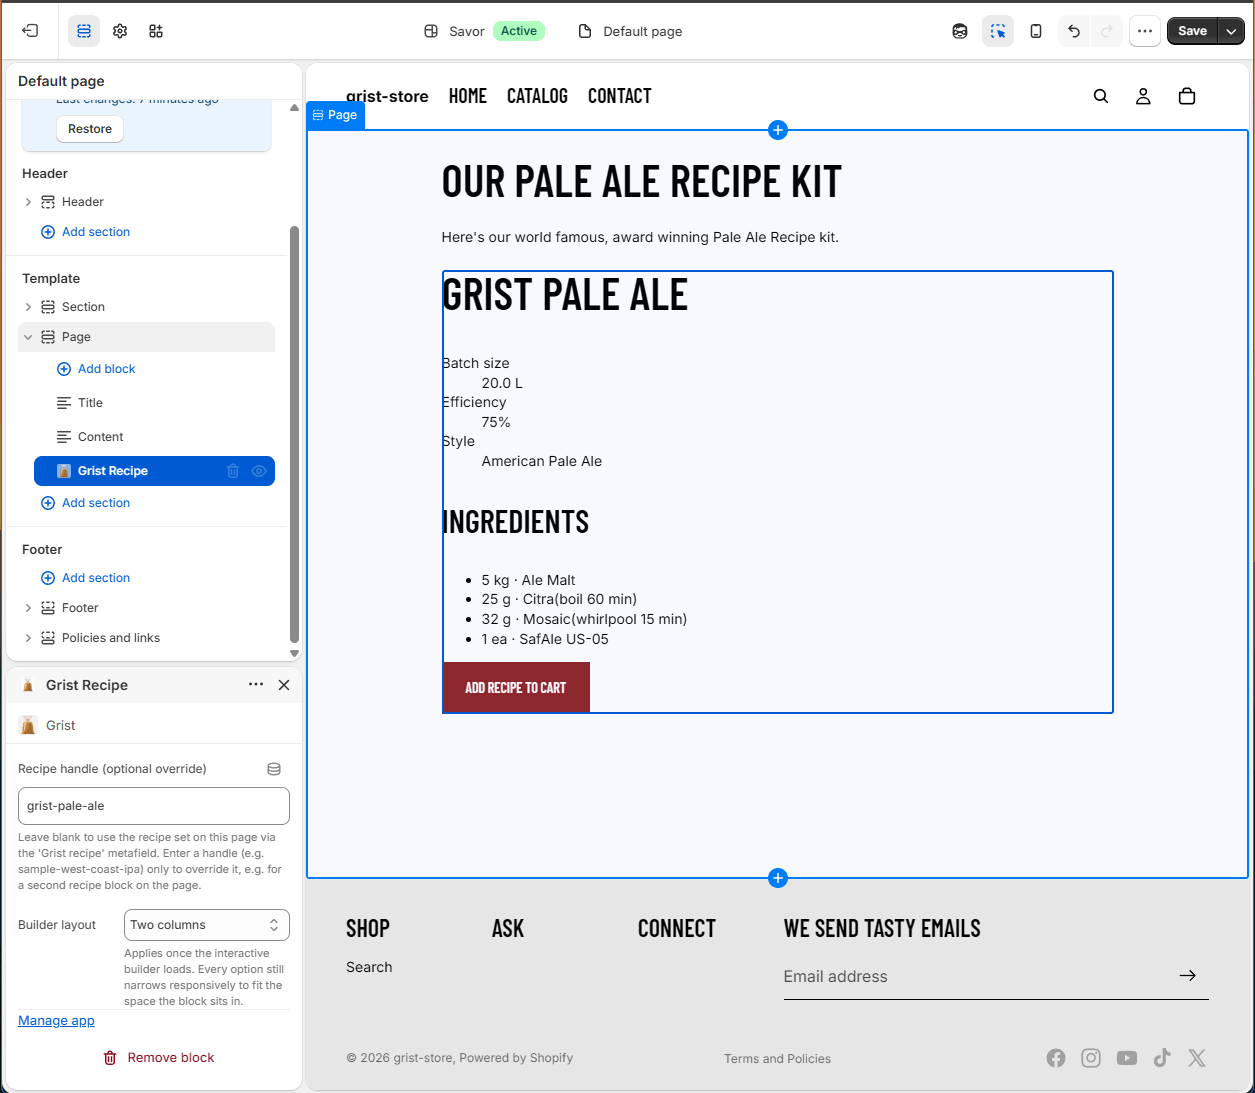
Done!
The recipe renders as proper indexable HTML (good for SEO, with recipe structured data), and then upgrades into the interactive builder - with live stats and add-to-cart - once the page loads.
How do I let customers create their own recipes?
Easy! Create your page and wherever you want, add the Grist Recipe block - just like in the above step - but don't add a recipe handle and leave the Grist recipe metafield blank.
How do I configure milling?
Open Settings in Grist. There you can control:
- How you offer milling - Free adds milling as a simple cart option (just a label like "Milled (Coarse)" stamped onto the grain lines and shown on the order - no product changes). Paid lets you charge for milling by linking each option to your own Shopify milling product.
- Show milling options on the recipe builder - toggle milling on or off for customers.
- The list of milling options themselves.
Each section has its own Save button, so you can update copy/layout and milling independently.
A product wasn't found during onboarding - how do I add it?
That's expected - the wizard only shows products it recognised or that looked like ingredients, and you may have removed some or added products after setup. You've got two options:
Set up a product Grist already stocks but didn't match
- Go to the Ingredients page in Grist.
- Click Set up a new product.
- Select variant and pick the product from your Shopify catalogue.
- Grist suggests how to classify it and pre-fills any stats we recognise. Adjust the values, move it to the right kind (fermentable / hop / yeast) if needed, and approve it.
If a product doesn't exist in Shopify yet, create it in Shopify first, then set it up in Grist using the steps above.
One thing to check for by-weight ingredients: fermentables and hops are sold by weight, so each needs a weight set on the product in Shopify - otherwise the storefront builder can't size it into a cart. Grist's home dashboard flags any ingredients "needing a weight" with a direct link to fix each one.
What is the pick list block?
It's an app block that shows per-recipe pick lists directly on Shopify's native order detail screen. When an order contains ingredients a customer added from a storefront recipe builder, the block groups those lines by recipe and tells your packer exactly what to mill/measure, so they never have to open the embedded app to pack an order.
Where does it appear?
On the order details page in your Shopify admin (Orders → click any order), not on the storefront and not at checkout.
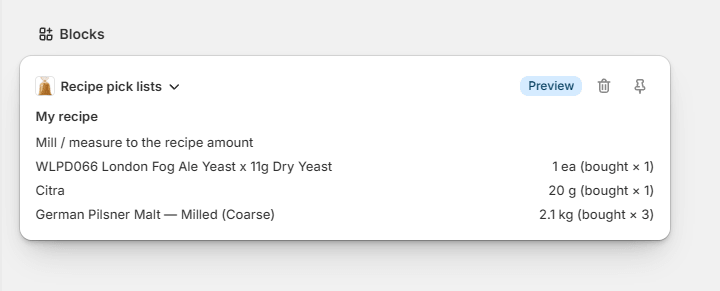
The pick list block
How do I add it?
- In Shopify admin, open Orders and click into any order.
- In the right-hand sidebar, find the "Add apps" / app block area (look for the section menu or the "•••" / customize option on the order page).
- Choose Grist Recipe Pick Lists from the list of available app blocks.
- The block pins to that order layout and will now show on every order automatically, you only add it once.
Do I have to add it to each order?
No. Once it's added it becomes part of your order-page layout and renders for all orders.
Why is the block empty or saying "no recipe lines"?
The block only groups line items that carry recipe attributes (the _recipe* custom attributes added when a customer builds a recipe in the storefront builder). An order placed without going through a recipe builder will show "This order has no recipe lines." Any non-recipe items appear under an "Other items" section.
What does each recipe group show?
- The recipe name as the heading.
- Each ingredient line with its milling/measure note.
- The recipe amount to measure out, plus the purchased quantity, e.g. 500 g (bought × 2). Lines without a recipe amount just show × quantity.
It says "Could not load pick lists", what now?
That's an Admin API load error for that order. Refresh the page; if it persists, confirm the app is installed and has order read access, then check the order actually has line items.
Does the customer see this?
No, it's an internal fulfilment aid, admin-only.
Where can I get help?
Reach out via the support page and we'll get back to you as soon as possible.